


|
Moviecam_schematic_animation.gif Size : 288.02 Kb Type : gif |


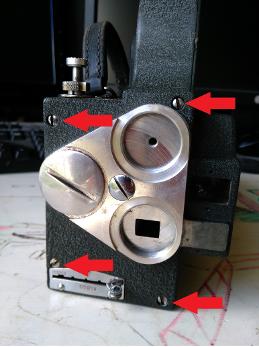
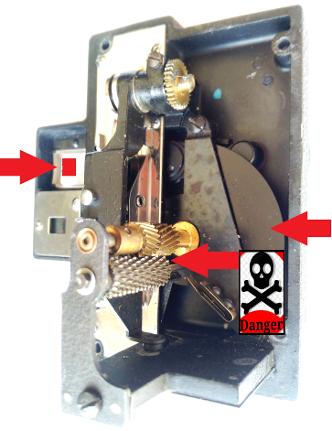
This image indicates the removal of the top film reel cog. Undo the screw on top of the cog first, then undo the second screw visible from outside the film chamber to remove the cog. Be careful dismantling the cog as the small parts have a very specific order. Photograph the order for re-assembly.
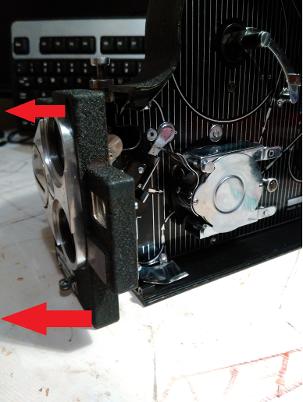
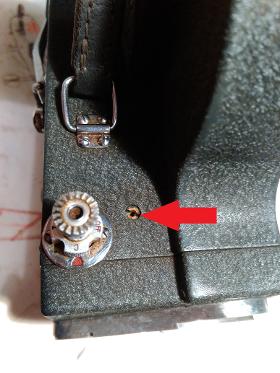
This picture indicates the film take-up cog. Undoing the top screw enables the cog to be dismantled. Similarly, to the other cog, the small parts have to be re-assembled in strict order. The indicated circlip does not need to be removed, if you are just cleaning the camera. The left arrow indicates a very small pawl, or hook. This has to be removed carefully in case it falls into the depths of the camera (a very bad thing)
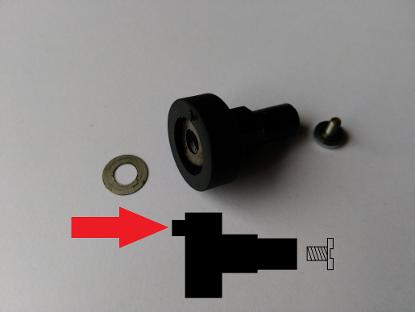
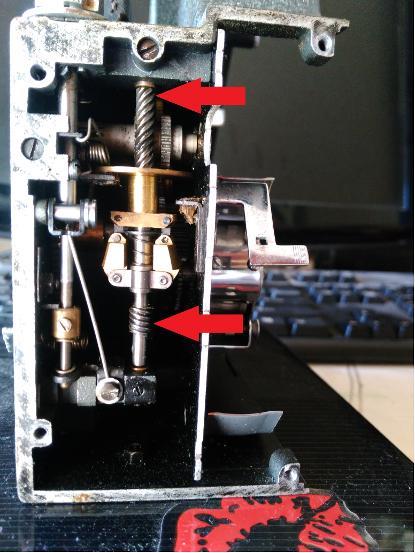
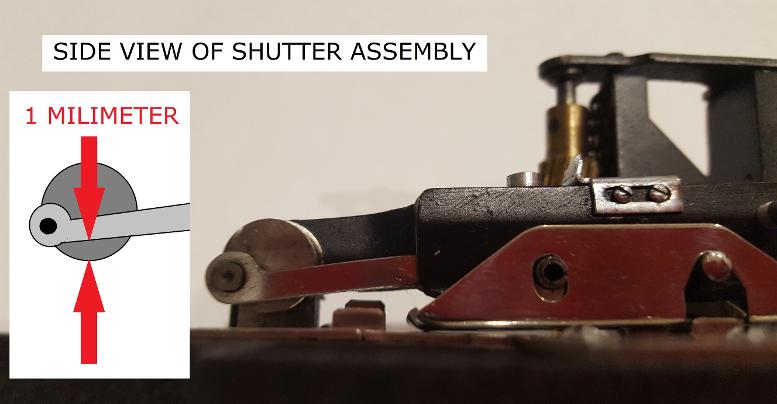
This picture portrays a side view of a cog with the small pin. This pin sits snugly in the hole in the pawl. During re-assembly great care has to be taken to get the pin in the hole.
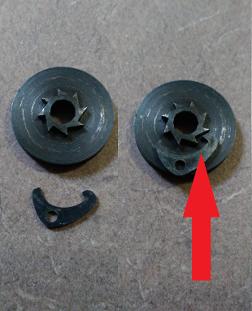
This picture indicates the positioning of the pawl. If the pawl is placed incorrectly, ie: backwards, then the take-up cog will not ‘take-up’ the exposed film.
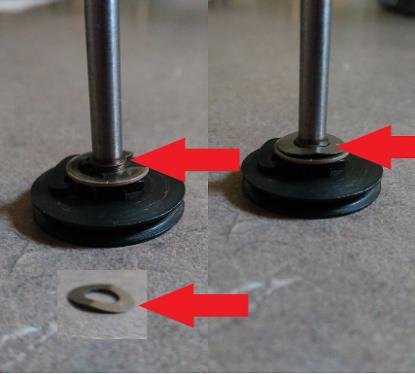
At the base of the cog spindle, take care re-assembling the washers. They have to fit around the spindle shoulder precisely or the other parts will sit higher and when the final screw is tightened the cog will jam solid.
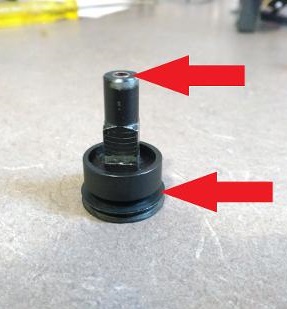
This picture indicates, as per the top arrow, how the top of the spindle should be flush with the cog. If the cog sits higher, start again.
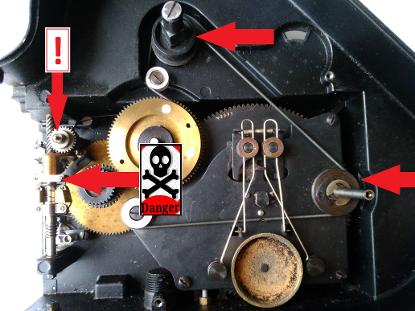
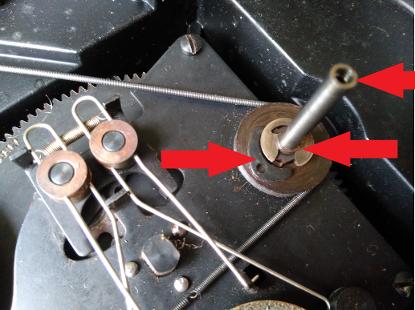
The below image indicates the cogs and holes in the film chamber base plate that need to line up for the base plate to be screwed back into place. Each cog will have a small amount of play so giving the base plate a few wiggles during re-assembly is needed for the base plate to sit properly. Gently moving the main film advance cog on the base plate will help re-engage the cogs. Each lettered cog or hole coresponds to the other.
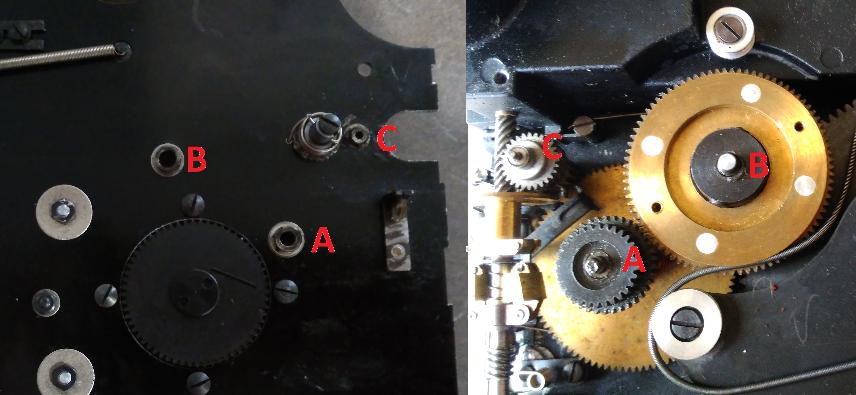
The image on the right indicates the vertical cog spindle that actuates the shutter cog. In all likelihood this spindle will not need removing. If clogged with dirt, clean it gently. Lubrication of the spindle need only occur via the oil hole as indicated in the above picture.
The arrow in the picture above indicates where lubricant can be applied to the shutter spindle (minimally)