WEBSITE UPDATE:
Due to the increased difficulty in people accessing this website and the sister, due to certificate issues from Yola, I am slowly migrating to Wordpress during 2023. These camera repair pages will remain here, but will no longer be updated.
For recent cine resource updates, please visit: https://aussiecine.wordpress.com/
For recent camera listings, please visit: https://aussiecinerepair.wordpress.com/
Lubrication: Prospective
D.I.Y lubrication should be researched well, as some cameras have very
specific
requirements, requiring specific oil and/or grease. If you do not know
what is needed, stop until
you know. Do not use automotive
products, or petroleum based greases as some plastic parts may “melt”. Lubrication should only be used
sparingly on
areas where metal parts rub against each other, such as bearings or worm
gears. Gears that only touch other gears via teeth will not need
lubricant. Plastic gears or moving parts may require
lithium grease, or similar.
Note: As with all equipment such as old cameras, a qualified service person is ideally the first stop when owning a camera. If, however, a person is moderately confident and not heavy handed, basic maintenance will assist in keeping the camera running long enough for you to enjoy using it and then save up money to get it serviced.
CAUTION! When working on a spring winding camera always ensure the spring is run down entirely. Not only is it potentially dangerous to work on anything with a coiled spring inside, the camera motor accidental running a few hundred frames could mess up your marking needed for reassembly.
Thanks to N. Brown for offering these photos of his Bell & Howell 240T during such a repair
Manuals
Open the film guide arms by lifting the small pin that holds them in position. Once lifted, both arms can be pushed back.
Remove the pressure plate, be sure not to loose as this is integral to the film sitting snugly against the frame.

Remove two small screws and lift away the plastic cog surround.
Now unscrew the film advance cog, lift away, and remove the screw sitting under the cog.
Now remove the film remaining arm, then the screws around the edge of the base plate.
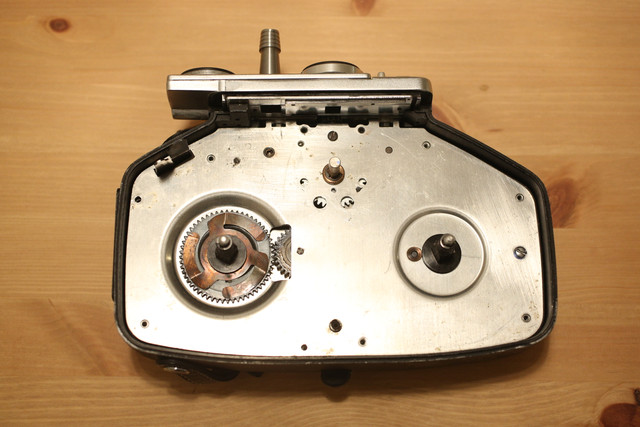
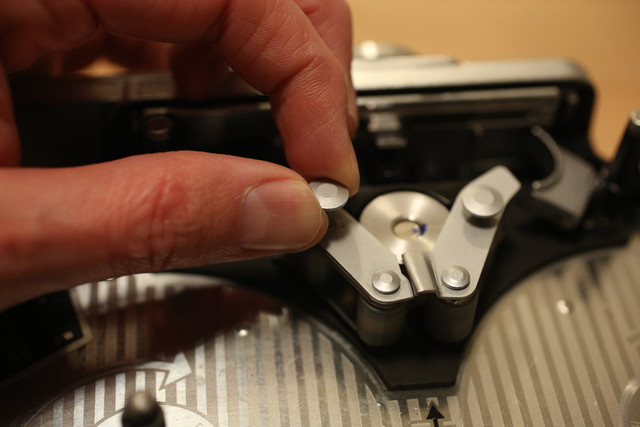
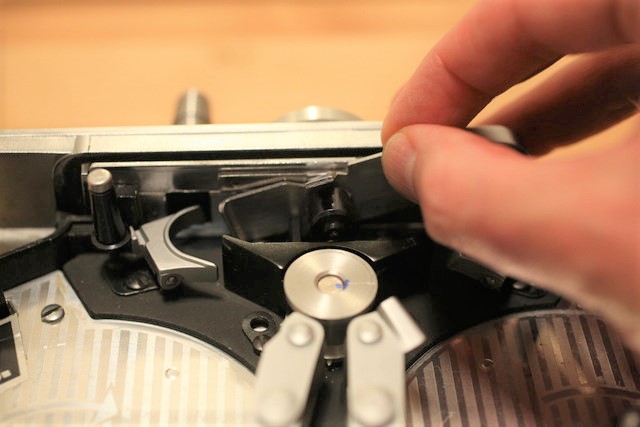
Once the base plate is removed, the main film winder cog can be seen.
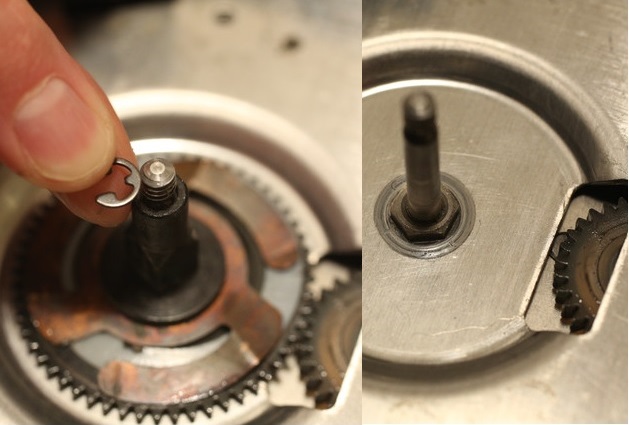
Remove the small circlip very carefully with a small blade screwdriver, levering it out of it's groove. Then lift away the cog.
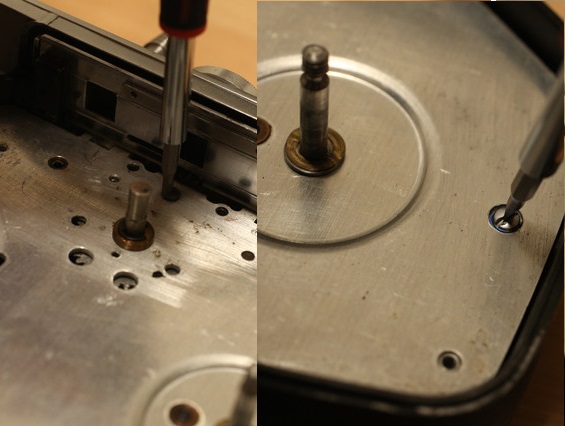
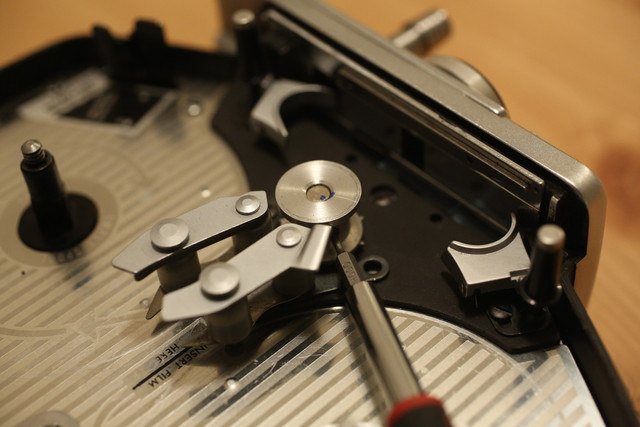
Remove the remaining screws around the base plate.
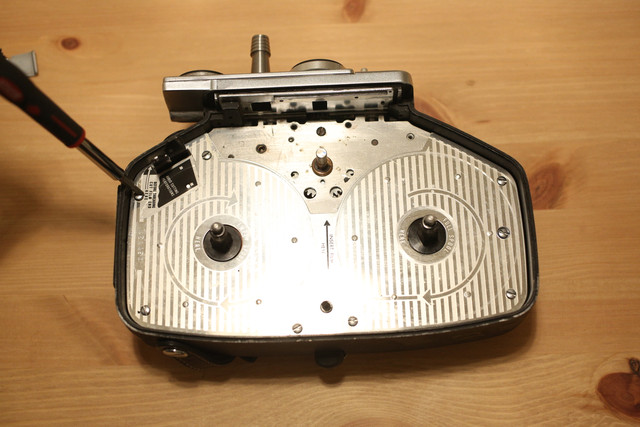
Continue removing screws from the front of the camera
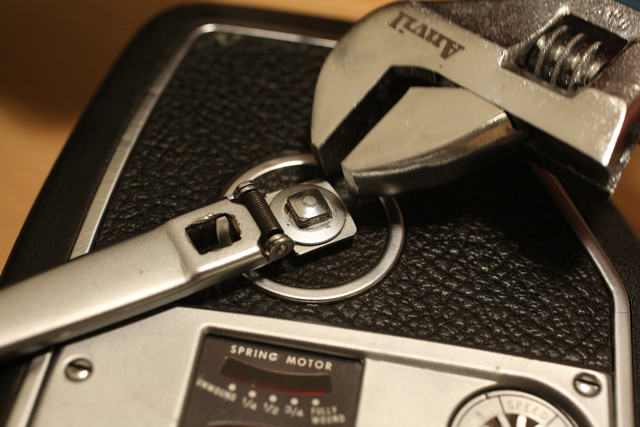
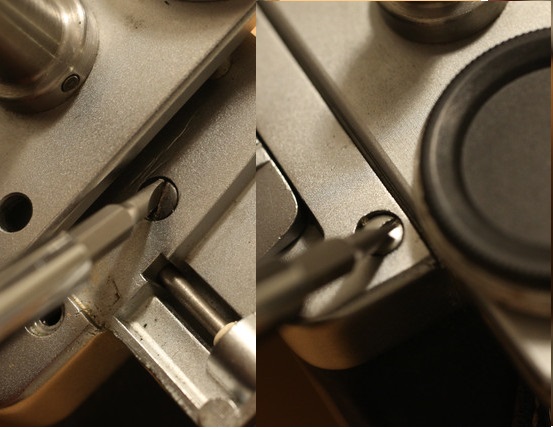
Holding the winding handle, loosen the small screw holding the winding arm.

Remove the leatherette to gain access to this screw. If the screw is gummed up with old glue, alcohol on a Q tip helps.
The front of the camera can be removed, exposing the shutter mechanism.

To further disassemble the camera, the shutter plate needs to be removed. Remove the indicated screws.
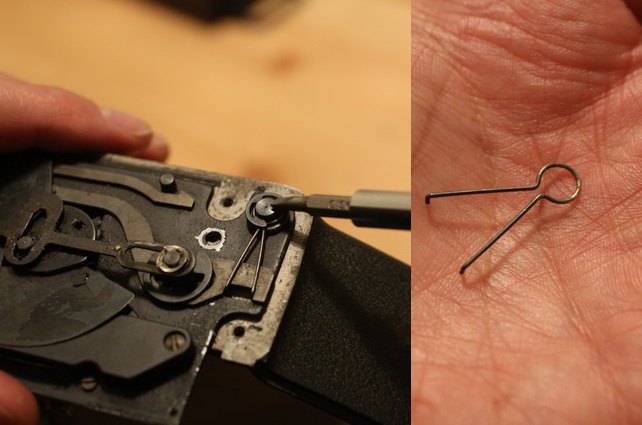
When removing this spring clip, be careful not to damage or lose it.

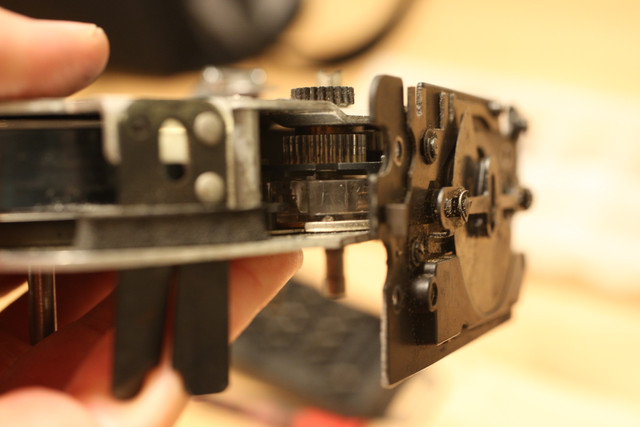
Once the shutter plate is removed the camera spring motor can be lifted from the camera shell.
Once the cogs can be accessed, you can investigate if there are problems, cogs misaligned, spindles bent, screw holes stripped, etc. Lubricate sparingly, mark positions of everything in case you move it during cleaning.
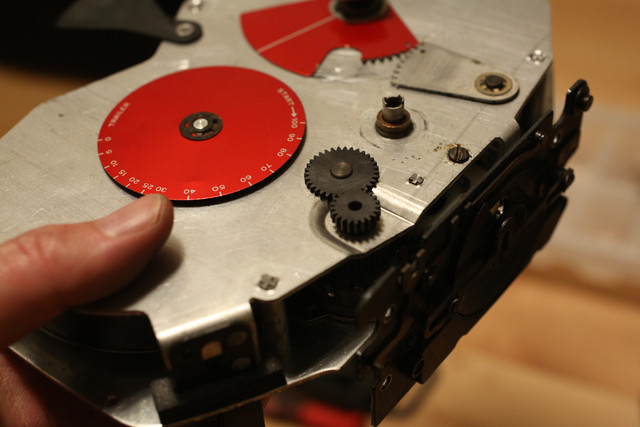
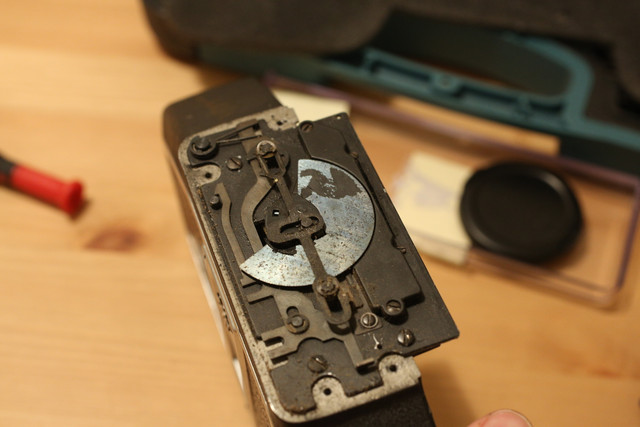
The film counter and film remaining discs can also be checked to make sure they are operating smoothly and not binding.
Note:
In many cases of a 16mm spring motor cine camera not working, the solution can often be fairly simple, a cog popped out of alignment, a re-assembled camera's spring or cog may be binding, or a tiny spring is broken or put back incorrectly. However, sometimes the cause of a fault cannot be found. A person taking a camera apart, 50 years after it was built, and without any manual, has to gamble that everything in the camera is how it was from the factory, otherwise the repair turns into engineering detective work. Trying to discover how something should work before being able to work out if it actually still does.Thanks to N. Brown for offering these photos of his Bell & Howell 240T during such a repair
DISCLAIMER:
This is a Copyright Disclaimer under section 107 of the Copyright Act of 1976, allowance is made for “fair use” for purposes such as criticism, comment, news reporting, teaching, scholarship, education and research. Fair use is a use permitted by copyright statute that might otherwise be infringing.Fair Use permits limited use of copyrighted material without having to first acquire permission from the copyright holder. Fair use is one of the limitations to copyright intended to balance the interests of copyright holders with the public interest in the wider distribution and use of creative works by allowing as a defense to copyright infringement claims certain limited uses that might otherwise be considered infringement.
The creator of this website declares that information and photographs copied from other websites and placed here is solely for the purpose of education and research. The creator of this website does not earn money from information published here. The creator of this website always references, where possible, the original creator of work that is published here.
If any person wants to dispute this, and/or believes the creator of this website has infringed on a person's copyrighted creative material, please email me at mishkin.film@gmail.com
This email address is checked frequently.