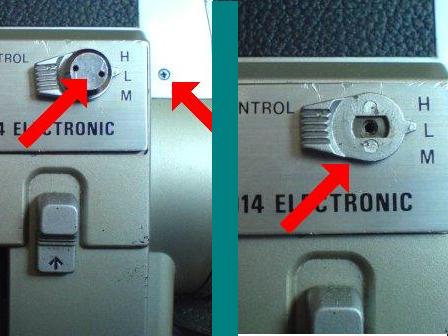
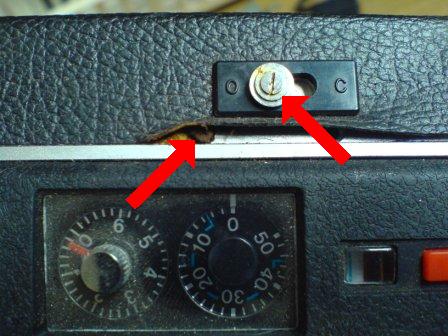
Using a pointed tool and light hammer, gently tap the screw in a anti-clockwise direction. Once removed lever off the switch. Also remove the screw, middle arrow, from both sides of the camera.
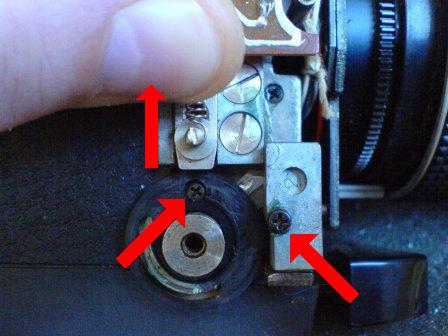
Remove both small screws either side of the hand grip release lever.
Peel up a corner of the vinyl either side of the power zoom buttons, remove each screw.
Slide back the battery cover, remove both screws.
Unscrew the eyepiece shutter, right arrow. Peel back the vinyl, left arrow, and remove screw.
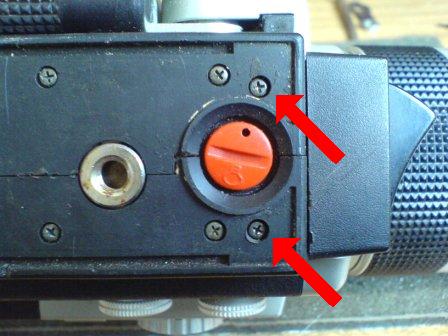
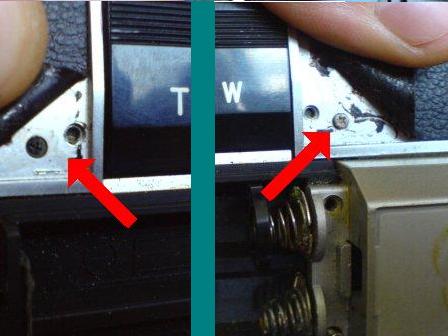
Remove both screws as indicated, only the two.
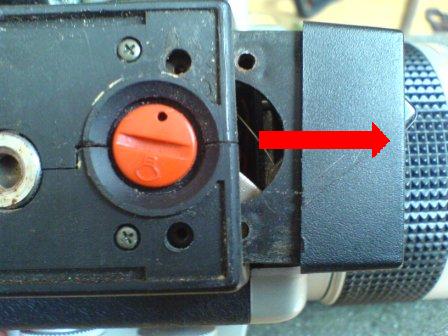
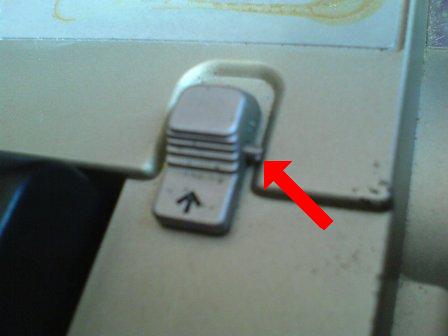
Slide the trigger cover forward.

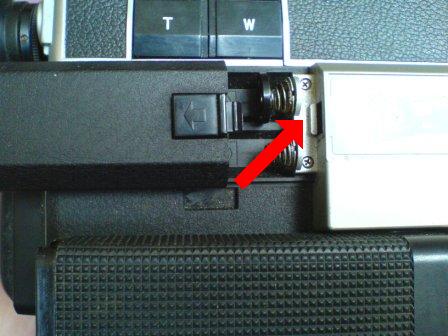
Unscrew the left screw, hand grip side, or both if you intend on removing the camera body covers.
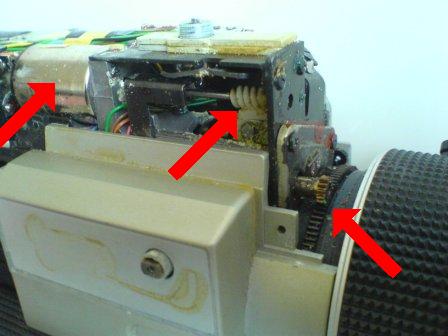
By this stage you should be able to remove the top cover. This will reveal, as well as the eyepiece, but the power zoom motor, left arrow, the zoom shaft, and the cogs on the lens body. This example reflects a great deal of oxidisation. Do not lubricate the cog around the lens body, right arrow.
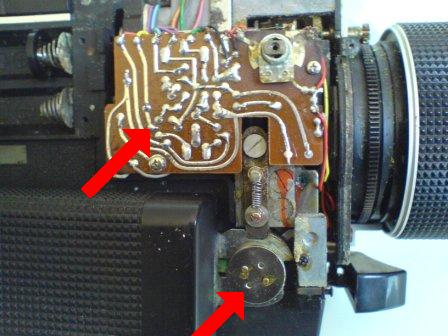
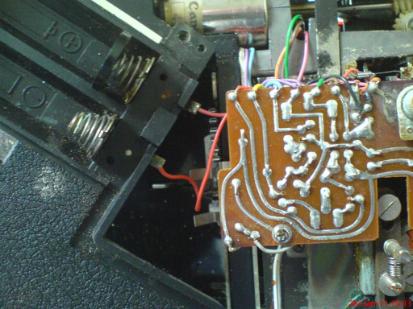
By removing the side cover, you will see circuitry, left arrow, and the hand grip screw and electrical contact. If the circuitry has either broken solders or burn outs, seek and experienced person to repair.
In the first part, left, Use a blade to scrap away glue around the two screw heads, then remove screws. In the second part, right, using a pointed tool, insert into one of the small holes, and using a light hammer, gently tap to unscrew the hand grip screw,
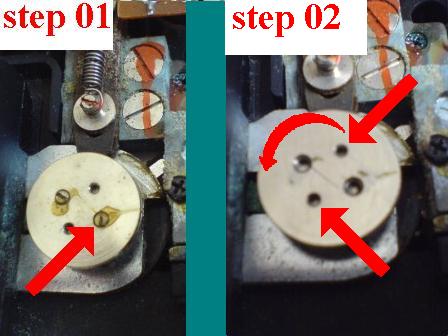
Once the screw has been removed, lift the handgrip off the camera. The left arrow indicates the underside of the hand grip, notice the oxidisation around the brass pin that conveys current to the metal contact strip, right arrow. Clean or replace the hand grip contacts. Check the metal contact strip for breakage. Re-solder or replace if broken.
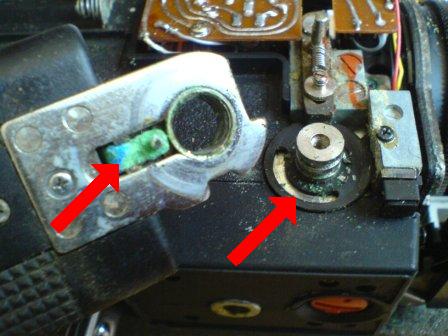
If the contact is corroded through, use thumb to move lever out of the way, and undo both indicated screws. The little alloy block on the right can be gently lifted off to enable viewing of the wire connected to the hand grip contact.
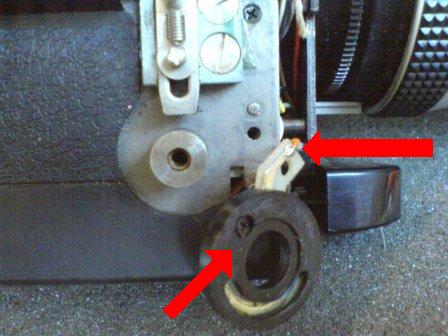
If the wire is broken, top right arrow, either re-solder or replace. A replacement electrical contact can be used off another Canon, models 518 up 814 use a similar contact. If replacing, gently prise the plastic ring containing the metal contact away.
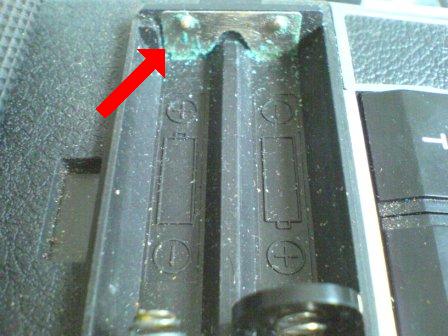
BATTERY COMPARTMENT
When the battery contacts become oxidised, use light sandpaper to clean, and apply an drop or two of spray lubricant to protect in future.
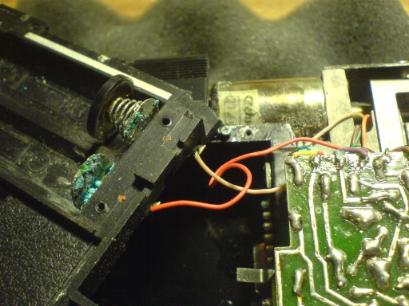
BATTERY COMPARTMENT REPLACEMENT
If the connections are too corroded to be renewed, replacing the camera side cover may be required. Once the cover is lifted away, the two wires as shown above need to be cut and re-soldered onto a camera side cover that is in better condition.
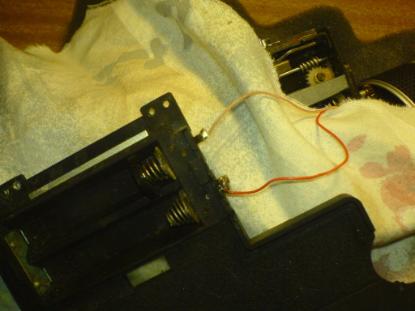
When soldering the wires, be sure to cover the camera so no solder falls and damages other electronic conections. Cameras may differ in wiring colour slightly, be sure to re-connect the correct wires. Test all solders for strength.
This image shows how it should look prior to attached the camera side cover back onto the camera.