Prior to replacing the 814 eye piece, it is nessesary to complete steps 01 to 09 in "814 Hand grip removal." The following pictures and instructions begin with the top cover removed already.
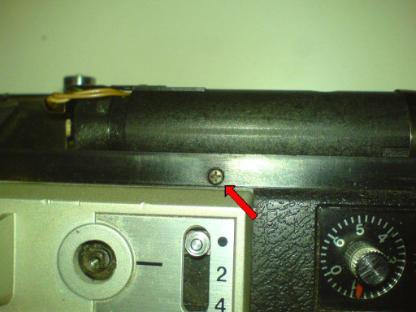
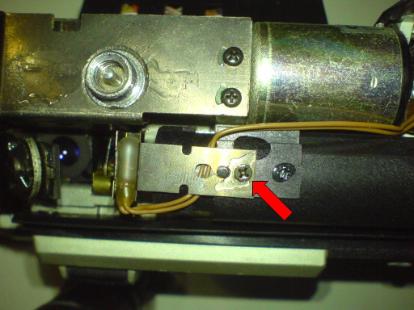
Remove the indicated screw.
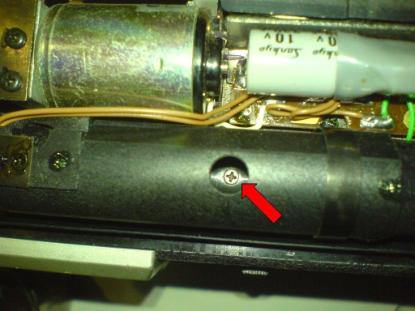
Remove the indicated screw. Do not worry if the screw falls off the end of the screwdriver, it will fall out once the eye piece is removed.
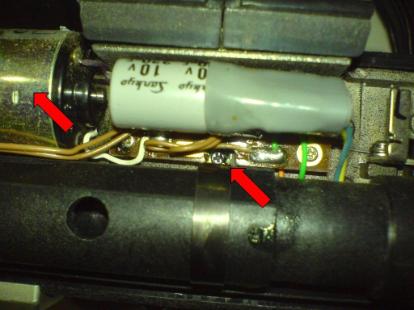
Remove the indicated screw that secures the metal band holding down the eye piece. The left arrow indicates the zoom motor.
When removing the screw be aware that it will be secured with a drop of glue, it is not too hard to undo. Be sure to "earth" yourself prior to touching any electronics with a hand tool.
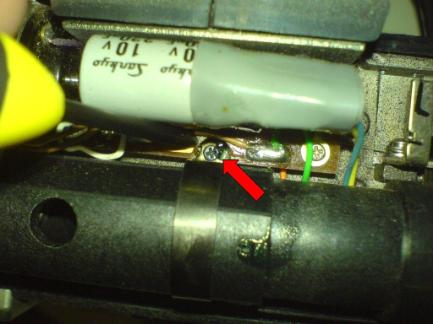
Remove the indicated screw, just the one.
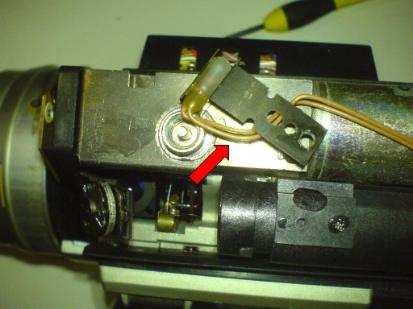
Move the metal tab aside, the wire should not be hard and will not break.
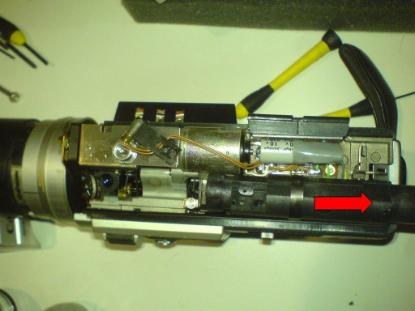
Gently slide the eye piece rearward, be aware the metal band remains in place and may need to be gently levered aside to enable the eye piece to easily be removed.
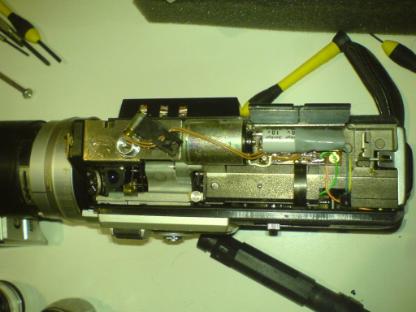
While the eye piece is removed, clean the area with compressed air from an aerosol. make sure the can is directed away from the optics.

The arrow on the left indicates the mirror angled for the eye piece, use an ear bud to clean. The arrow on the right indicates the exposure needle, be very careful not to damage. The center arrow indicates an optic worth keeping very clean!
THINGS TO KEEP IN MIND
If the eye piece is difficult to see through because of fungal growth on the internal lenses, it is better to replace the eye piece entirely using a spare non-working camera. Recovering a fungus infected lens is possible but labour intensive and may be required frequently throughout the cameras life.
Eyepieces across the Canon 518, 814, and 1014 all differ. This should be remembered when buying "parts" cameras.