TYPES OF LENS DAMAGE:
FOG: If, when looking at the outer lens, there seems to be fog, chances are it is condensation. This will affect film shot with the camera. The footage will appear either out of focus, or have a softening aura to the footage. Removing the outer lens, cleaning the inside, and reassembling will solve this problem. See caution below.
FUNGUS: When looking at the lens from the front of the camera, and you see what appear to be spider's webbing inside the outer lens, this is fungus. By removing the outer lens, you may be able to either clean it or replace it. Moderately abrasive cleaner may be needed for this. Be aware that any such abrasive material, if not applied correctly, will damage the lens. Refer to a camera technician for advise. If the fungus is well established, it will have "pock marked" the lens. In this case replace the lens. See caution below.
SCRATCHES OR CHIPS: If the outer lens has either of these problems, replacement is the best remedy.
CAUTION!
Lenses have coatings designed to offer the best protection from reflections from outside and inside of the lenses. Coatings also protect the glass from harmful UV rays. If you use an alcohol based cleaner, you run the risk of removing these coatings. Only use a cleaner specific to camera lenses. When dismantling the lens body, be very aware of dust particles and hairs. Use latex gloves when handling lenses.
If the lens has attached a filter or otherwise that has seized onto the lens, remove the glass. Remove the glass using the best method depending on what you intend to replace. Lens are easily scratched. gently cut two lines into the filter. The metal is soft so do not use a vice.
Using pliers, gently bend one side of the filter frame inwards, this should allow the filter frame to pop off.
Remove the three screws securing the lens sleeve.
Take care to note a marking of alignment for later reference to aid reassembly.
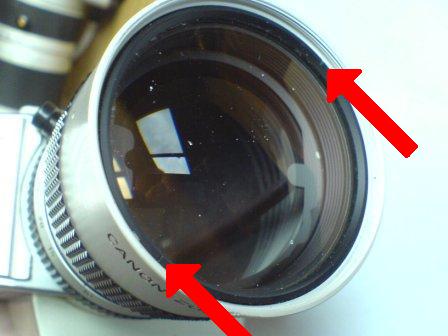
Using a screwdriver, locate the two shallow grooves in the retaining ring. Gently tap, alternating between both grooves, in a anti-clockwise direction. The retaining ring is threaded.
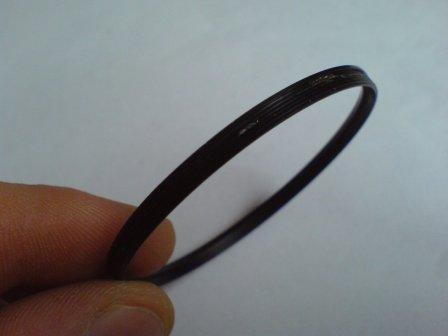
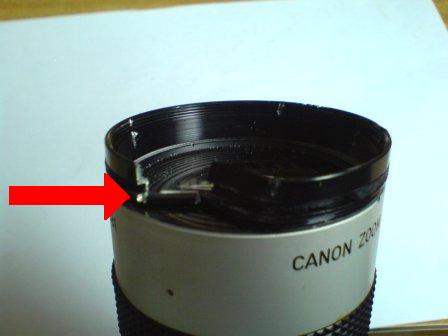
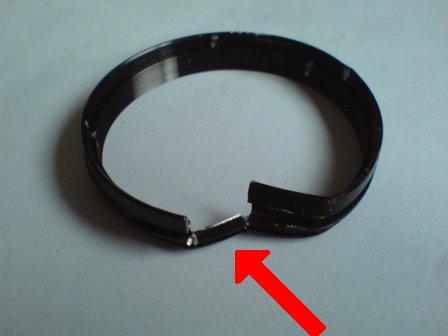
This is the retaining ring removed. Do not bend or attempt to repair. Any alteration of the thread will prevent you from screwing it back into place.
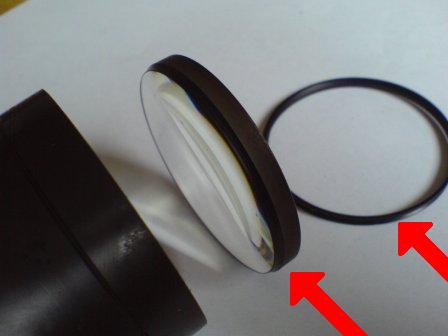
Once the retaining ring is removed, the outer lens should easily fall out, be sure it lands softly, unless this is what you intend to replace. The right arrow indicates the retaining ring. The left arrow indicates the outer lens. The outer lens has a beveled edge, this is on the camera side of the lens, a replacement must be inserted the same way as the above was removed.
The arrow indicates a metal spacer. This seperates the outer and inner lenses. This too will slide out without effort. The inner lens will then easily fall out. Take note of the direction in which it is removed as it is concave in shape.
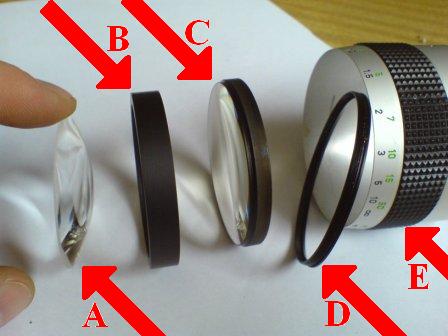
The above pictures shows the order, camera body at left, of the arrangement of the lenses. A: inner lens, B: spacer, C: outer lens, D: retaining ring, and E: lens sleeve.
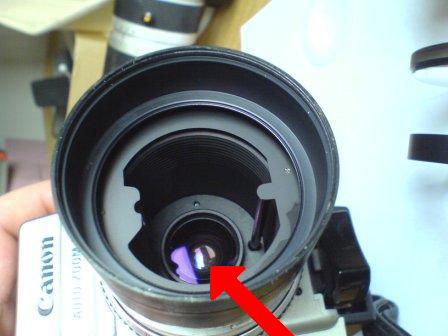
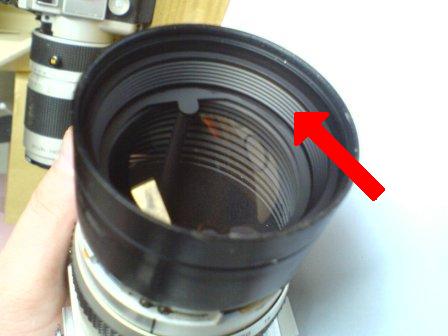
The arrow indicates the zoom lens. As there is little chance of this lens being damaged without the other two, replacement is perhaps not needed, instead another camera entirely may be better.
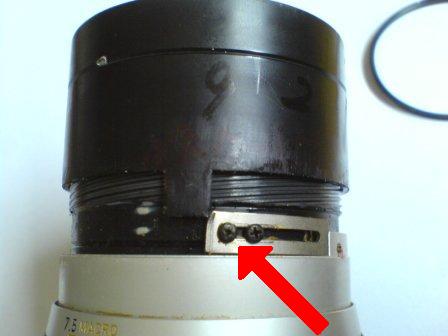
If the movement of the lens is difficult or for some reason damaged, replacement can be made by removing the indicated screws, and unscrewing the lens body. Again, take note of the alignment, very important. When screwing on a replacement lens body, be aware that a specific thread must be used to arrive at the original alignment. Be patient. Only use graphite powder sparingly if you intend to lubricate the thread.
MORE LENS DISASSEMBLY DETAILS