WEBSITE UPDATE:
Due to the increased difficulty in people accessing this website and the sister, due to certificate issues from Yola, I am slowly migrating to Wordpress during 2023. These camera repair pages will remain here, but will no longer be updated.
For recent cine resource updates, please visit: https://aussiecine.wordpress.com/
For recent camera listings, please visit: https://aussiecinerepair.wordpress.com/
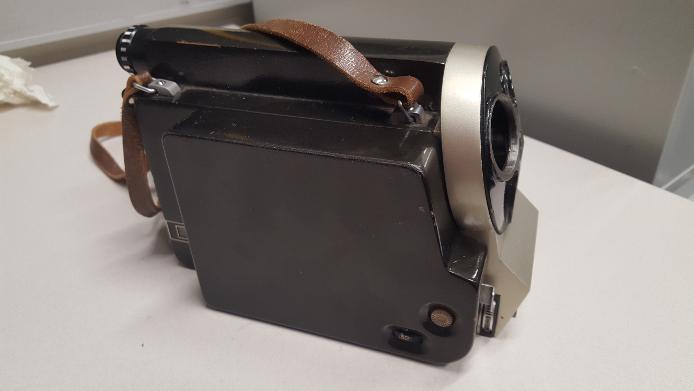
KIEV 16UE (Battery Powered)
This particular camera had a couple of issues when i received it. The "RUN" push button was seized and the battery connections appeared damaged and it was missing a battery tray. I cleaned and lubricated the internal gear assembly, placed it back inside the camera body and mounted a spring motor to the camera to test if the internal gear assembly worked. once it did, I turned my attention to the battery motor. Connecting a 6-8volt battery to the indicated terminals, the motor ran quite strongly and seemed to run backwards and forwards successfully. After a few minutes the motor stopped working and the terminals became hot. So I surmised that perhaps a capacitor or relay died. Not entirely surprising for 50 year old electronics that may have been sitting for the past 30 years. The camera body can still be used with a spring motor attached.
The only difference between the 16UE (electric) and the 16U (windup) is the detachable motor. A spring wound motor can be attached to the electric version, but an electric motor cannot be attached to the windup version. The electric version has frame rates of 16,24,32, and single frame. These cameras were considered semi-professional and as well as amateurs, were used for television and by small studios. (reference page)
Company Information: Kiev Automation Plant named after G.I. Petrovsky (on some movie cameras the manufacturer was designated as “Tochpribor factory”) from the second half of the 1950s to the 1980s, he produced 16-mm film cameras, which were used mainly for professional purposes. Filming apparatus “Kiev-16U”, designed for filming films on various topics and in a variety of conditions. Designed to work with 16 mm film with one-sided or two-sided perforation wound on a reel. The reel capacity is 30 m of film. The movie camera is equipped with three lenses on a rotary turret: Vega-7 (2/20 mm), Mir-11 (2 / 12.5 mm) and Tair-41 (2/50 mm) The lens mount is M32x0.5 (reference page)
Lubrication: Prospective D.I.Y lubrication should be researched well, as some cameras have very specific requirements, requiring specific oil and/or grease. For most of the camera maintenance i have done i use “Singer machine” oil for gears and cogs, a light viscosity oil suited for low load and speed applications, commonly used for sewing machines. I use aerosol Inox-3 to treat metal surfaces and Inox-6 synthetic grease on sliding parts.
Note: As with all equipment such as old cameras, a qualified service person is ideally the first stop when owning a camera. If, however, a person is moderately confident and not heavy handed, basic maintenance will assist in keeping the camera running long enough for you to enjoy using it and then save up money to get it serviced.
REMOVING BATTERY MOTOR
Start by lifting off the motor cover, it is not screwed on, simply a friction fit.

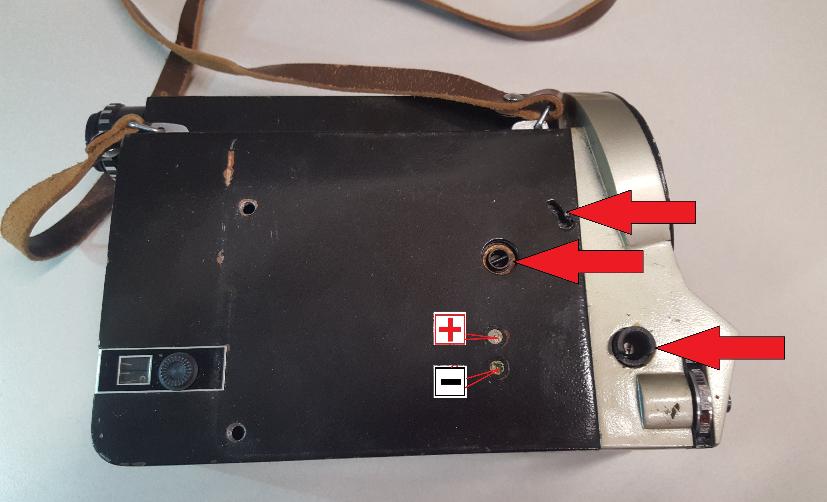
In the case of this camera, the plastic tray that holds the batteries is missing. After market battery trays of the correct battery capacity are easy to obtain and solder in connections. After i test the above electrics I will instal a battery tray. Continue by loosening the two indicated screws.
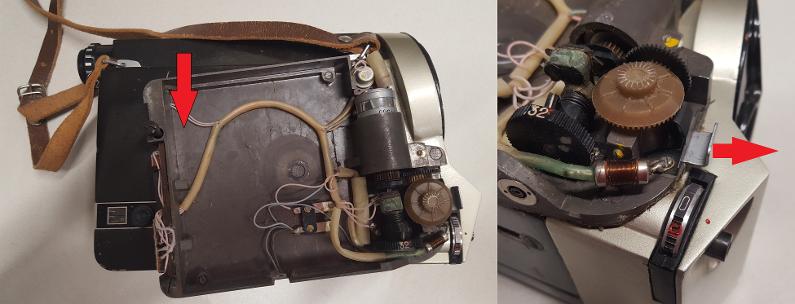
Once the motor's securing screws are loosened, the motor can be manoeuvred. Next, pull the metal slide outwards, as indicated by the arrow, and gently lift motor assembly upwards to release the motor.
Removing the motor assembly completely you can see the spring drive connection, center arrow. This engagement is for the spring motor version. The top arrow indicates the slot that the spring motor's pin enters. The battery motor does not use the pin and slot engagement. The bottom arrow indicates the slotted cylinder that the battery motor connects through. The positive and negative pictures indicate the two electrical connections to the switch inside the camera body that is activated by the "RUN" push button. When the battery motor is mounted, the push button will close the circuit and the motor will run, therefore turning the small coupling that connects as indicated by the bottom arrow.
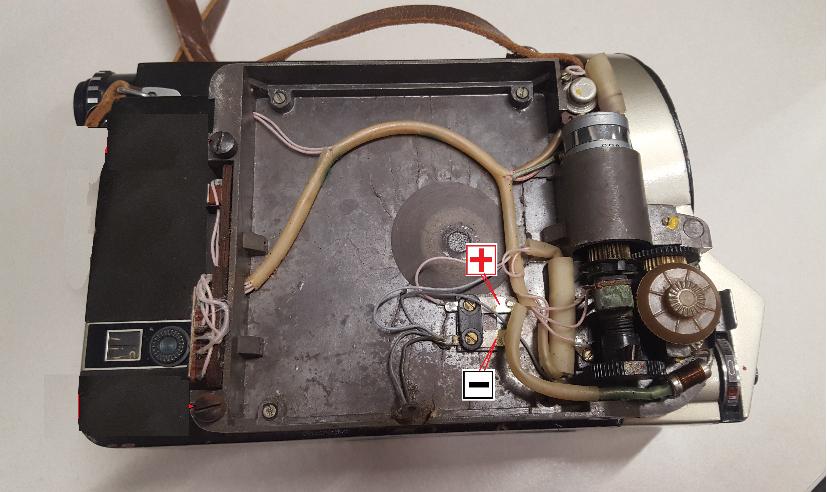
The positive and negative pictures indicated the correct power connections for a 6-8volt power source. Also worth reading are the good instructions on what various functions do, the links are at the top of this page.
FURTHER DISASSEMBLY
To continue disassembling the camera, follow the procedure detailed on the previous page "KIEV 16U" The only real differences between the windup and battery camera is the run switch, detailed below, and the motor mounting.

There is a switch activated by the run trigger. On this camera the run switch was seized and was manually de-seized. Before placing this gear assembly in the sonic cleaner I unscrewed the indicated screws and secured the switch out of the cleaning solution once in the sonic cleaner.
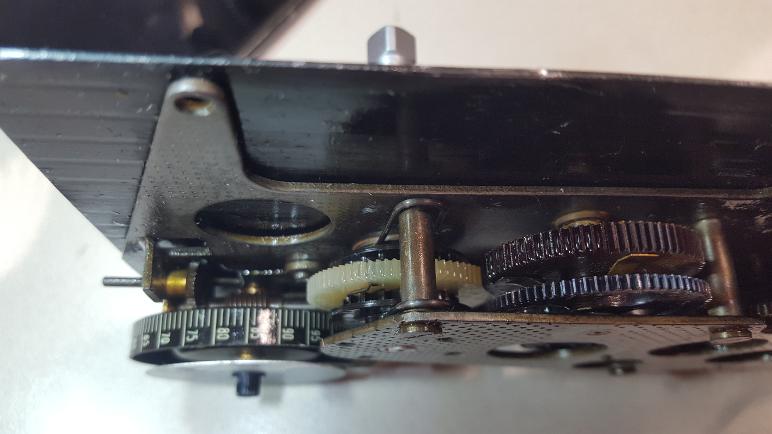
After being cleaned in the sonic cleaner, I applied drops of light oil to each cog, and while manually rotating the gears, the oil traveled to all teh other cogs.
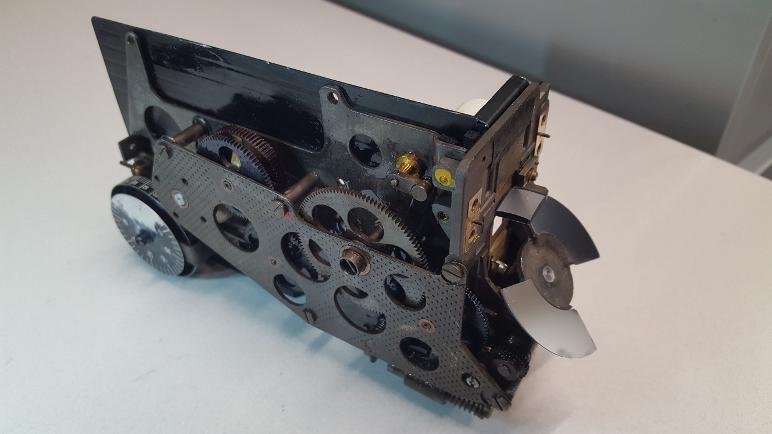
Once cleaned and dried I applied Inox-3 to the metal surfaces to prevent flash rusting. Then I put small drops of light oil on cogs and bearings. Always wiping off excess oil or spray. The camera above is a windup version, and was made in 1972. Before it's cleaning, it was loud and appeared to fluctuate in speed when running. The sonic bath removed 50 years of dust and old oil.